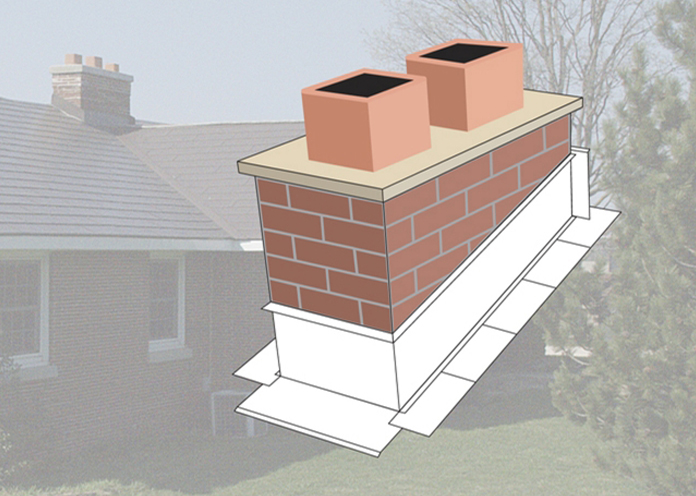
Chimney Flashings
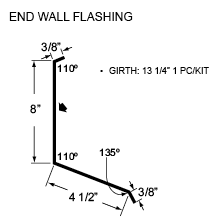
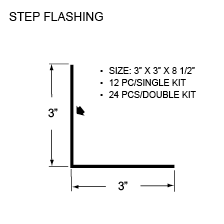
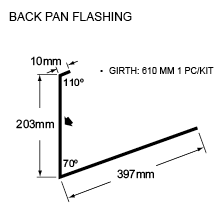
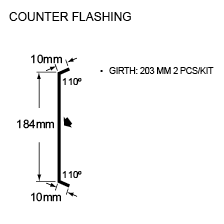
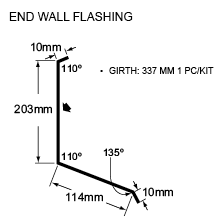
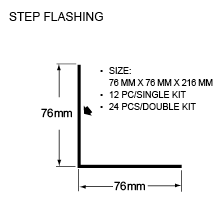
Agway Chimney Kits are available in two sizes – 24” (610 mm) for single chimney and 44” (1118 mm) for double – in four standard colours, including Black, Charcoal, Coffee and Dark Brown (custom colours are also available, but will require wait times). Agway flashings include: Back Pan Flashing; Counter Flashing; End Wall Flashing and Step Flashing, and all are in 29 gauge. Kits come complete with detailed installation instructions.
Measurement Type
Profile Picture
Install Diagram
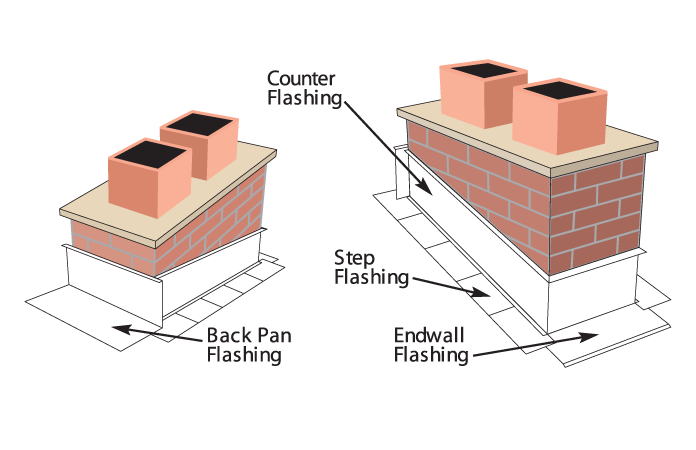
Chimney Kits are available in two sizes:
- 28” Single Chimney
- 44” Double Chimney (shown)
Stock Colours
- QC18262 Black
- QC18306 Charcoal
- QC18326 Coffee
- QC18229 Dark Brown
* Other colours available – allow 2-3 weeks
Flashings
Note: All flashings in 29 ga.
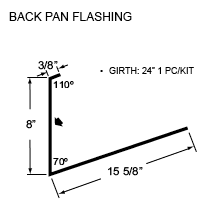
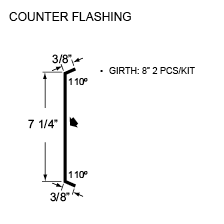
Chimney Kit Installation
Note: For Re-Roof applications, strip and clean around existing chimneys make any required repairs to the substrate and chimney.
- Install ice and water protector around the chimney, starting at the bottom and proceeding up the sides, finishing at the top. The top should have a minimum of 24” up the roof and 4” up the chimney; the sides and bottom having 8” on the roof and 4” up the chimney.
- Install the shingle to fit around the chimney; the sealing line should be within 3” of the chimney.
- Install the End Wall Flashing, trim and notch the flashing to extend past the chimney on the roof, and bend the sides up the chimney. Fasten to the roof. Apply a quality butyl sealant at each corner up the roof a minimum of 8″.
- Start the Step Flashing over the End Wall Flashing and apply a quality butyl sealant on each edge of the step flashing. Continue with each StepFlashing up the sides, finishing at the top by trimming and bending around the top.
- Install the Back Pan Flashing at the top of the chimney and extend beyond the sides of the chimney by at least 3”.
- Install the Counter Flashing on the sides over the Step Flashing. Trim the Counter Flashing to butt to the Back Pan Flashing and over the End Wall Flashing. Fasten into the chimney at 12” centres down the sides and fasten at the front of the End Wall Flashing using waterproof fasteners.
- Apply a quality butyl sealant into the bird’s mouth portion of the Back Pan, Counter and End Wall Flashings. Also apply sealant to the Counter Flashing where it butts against the Back Pan on the vertical seam.
Install Diagram

Chimney Kits are available in two sizes:
- 711 mm Single Chimney
- 1118 mm Double Chimney (shown)
Stock Colours
- QC18262 Black
- QC18306 Charcoal
- QC18326 Coffee
- QC18229 Dark Brown
* Other colours available – allow 2-3 weeks
Flashings
Note: All flashings in 29 ga.
Chimney Kit Installation
Note: For Re-Roof applications, strip and clean around existing chimneys make any required repairs to the substrate and chimney.
- Install ice and water protector around the chimney, starting at the bottom and proceeding up the sides, finishing at the top. The top should have a minimum of 610 mm up the roof and 102 mm up the chimney; the sides and bottom having 203 mm on the roof and 102 mm up the chimney.
- Install the shingle to fit around the chimney; the sealing line should be within 76 mm of the chimney.
- Install the End Wall Flashing, trim and notch the flashing to extend past the chimney on the roof, and bend the sides up the chimney. Fasten to the roof. Apply a quality butyl sealant at each corner up the roof a minimum of 203 mm.
- Start the Step Flashing over the End Wall Flashing and apply a quality butyl sealant on each edge of the step flashing. Continue with each StepFlashing up the sides, finishing at the top by trimming and bending around the top.
- Install the Back Pan Flashing at the top of the chimney and extend beyond the sides of the chimney by at least 76 mm.
- Install the Counter Flashing on the sides over the Step Flashing. Trim the Counter Flashing to butt to the Back Pan Flashing and over the End Wall Flashing. Fasten into the chimney at 305 mm centres down the sides and fasten at the front of the End Wall Flashing using waterproof fasteners.
- Apply a quality butyl sealant into the bird’s mouth portion of the Back Pan, Counter and End Wall Flashings. Also apply sealant to the Counter Flashing where it butts against the Back Pan on the vertical seam.

